Cardiff found themselves looking relegation firmly in the face after a 3-0 defeat to Crystal Palace, who should now have done enough to stay up. Defensively, Cardiff were as poor as they had been when losing 4-0 at home to Hull and these two performances stand out more than any others this season for the simple reason that neither opposition had to play that well to earn a comprehensive win.

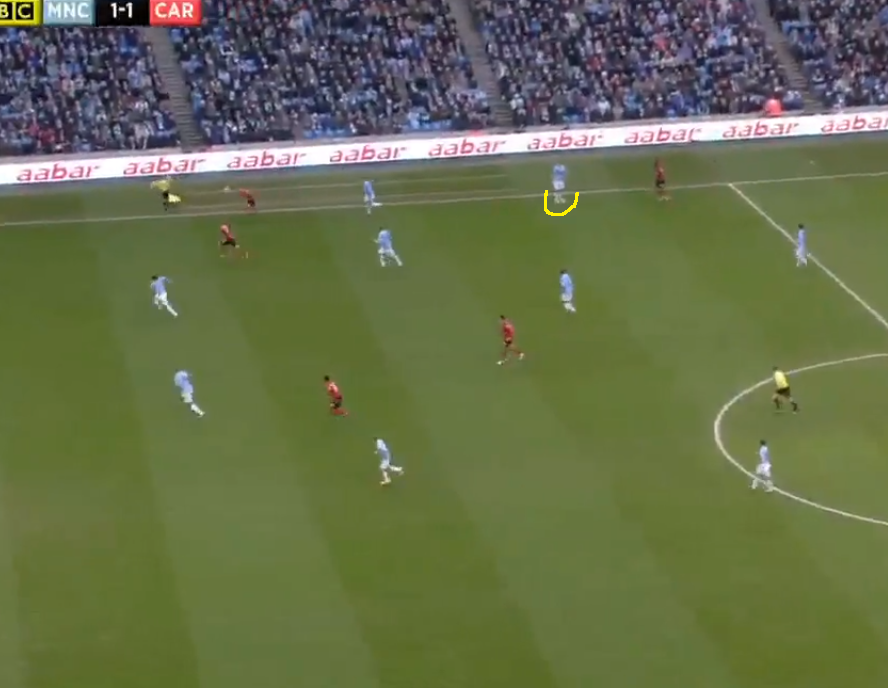
In terms of positions on the pitch, Cardiff and Palace lined up in a similar way. One midfielder (Medel/Jedinak) sat in front of the back four, with a centre forward (Jones/Jerome) supported by a more mobile team mate (Campbell/Ledley) covering the width of the pitch, another (Zaha/Puncheon) staying on their flank and a midfielder (Mutch/Bolasie) playing box to box.

cardpalace

This graphical representation does not do justice to the different approaches of the teams. Pulis, as always, had his team well drilled and they frustrated Cardiff by allowing them to have possession along their back four and closely marking Cardiff’s attacking players further up the pitch, rather than using the current trend of pressing the opposition in their own half. The passing combination table below shows how often Cardiff could only seek out another member of the back four or Medel with the ball. In contrast, Palace’s most involved player was the attacking Puncheon.

passcombo

Possession along the back four is not necessarily a bad thing but, despite having the ball, Cardiff did not have control. Good movement was needed in attack to create some space in the Palace half and this did not happen. With few clear options, Turner was often faced with the decision of another pass to Caulker or a raking long ball that was hit either too far to be chased or too hard to be controlled. This meant that when Palace gained possession they did so high up the pitch, which led to so much of their possession coming in dangerous areas -just 35% of Cardiff’s passes were made in the attacking third of the pitch, compared to 54% of Palace’s.

Daehli

Cardiff had started quite brightly, with Daehli standing out in the first 25 minutes. His quick feet frequently enabled him to lose his marker but there was all too often another Palace body, not to mention 50 yards of pitch, in front of him. After realising that he was the only Cardiff player looking to be creative, Palace concentrated on closing him down. A player with his attributes needs to be played further up the pitch; Jones supported by Campbell and Daehli might have worked  better.

Instead, the Cardiff player with the task of creating a chance from dangerous positions was Wilfried Zaha. The loanee used the ball poorly, seeming to be more interested in beating a man with stepovers rather than crossing. Solskjaer has recently made a habit of withdrawing underperforming players in the first half but kept faith with Zaha for more than an hour. By this point, he had become the focal point for the crowd’s frustration as Cardiff chased an equaliser.

Puncheon scores

The game’s opening goal had come after half an hour, as Cardiff’s lack of defensive organisation told. Players looked unsure of their roles as Palace built a simple attack on the right flank. In the first screenshot below, Turner (black arrow) has raced out to close down Ledley, who had the ball in a vaguely threatening but not dangerous position – with only Jerome in the box, Turner and Caulker should have been able to deal with any cross. Once Turner left the backline, Medel (white arrow) moved back into his position.

Puncheon1

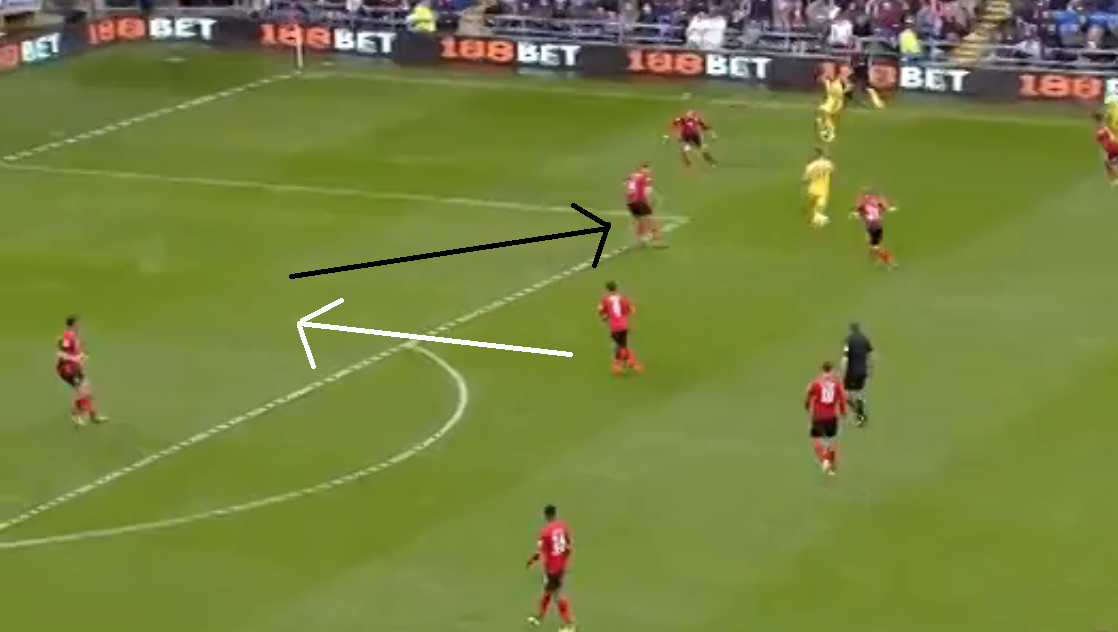
On its own, this should have been fine as Cardiff had more than enough players defensively to deal with a short low ball into the area, but Puncheon (yellow arrow, below) found space by racing into the part of the pitchthat Medel had just left. He was then allowed enough time to take two touches to steady himself before firing a low shot into the net. Taylor and Mutch were too late to get their blocks in.

Puncheon2

Having conceded this crucial goal, Cardiff did not change their approach until Zaha’s withdrawal on 60 minutes. During this opening hour, the only shot Cardiff had had on target was a deflected Campbell header while the game was still goalless. Cardiff continued to play into Pulis’ hands until Noone came on, after which his direct running and early crossing gave Cardiff some hope of an equaliser.

This proved to be shortlived when Medel overran the ball and resorted to pulling back Jerome in Cardiff’s half. Puncheon delivered the free kick well, but Turner lost Chamakh too easily for a free header, which was saved by Marshall into the path of another free player, Ledley. Once again, Cardiff’s players were without a clear idea of how to defend as a team.

The final substitutions changed little, with Bellamy taking Daehli’s place in midfield and, more bafflingly, Cowie coming on to play on the right wing in place of Jones up front. By now, the match was over and Puncheon topped off the win by curling in a very nice third goal as he took advantage of more space. Cardiff were a team counting down the minutes to the end of the game and perhaps to the end of the season.

 Vincent Tan

It would be interesting to know Vincent’s Tan thoughts on the respective performances of the teams. Crystal Palace gave the sort of tight display that spelled the end of Mackay’s days at Cardiff and they picked up three points thanks in part to an increasingly ragged performace from the new manager’s team. It has to be assumed that part of Solskjaer’s remit when taking over was to play a more attacking brand of football but it has come at the expense of goals leaking in at the other end – one clean sheet in 2014 and twelve goals conceded in the last three games speaks for itself.

Does Tan regret losing the devil he knew for the devil he didn’t? Probably not, but the team certainly no longer looks as organised in defence and when the lineup and formation changes so much from week to week, it’s not surprising that players can seem a little confused. Pulis knows that a team will get nowhere until the defence is put right and this is why he will still be managing in the Premier League next season.

Graphics provided by:
sharemytactics.com
fourfourtwo.com/statszone

Over the Christmas period, Cardiff replaced Malky Mackay with Ole Gunnar Solskjaer as manager. If their respective approaches could be summed up, it would be that Solskjaer tries to win while Mackay tried not to lose.

At least, that’s the theory. Cardiffkickaball takes a look at how true this is.

How do you compare two different managers at one club?

Their players might be generally the same but the other variables that come into play (injuries, form, opposition, and so on) make direct comparisons tricky. We’ll divide the matches played so far into four categories; firstly, home and away and then into those teams who’ll be fighting it out for European qualification (where Cardiff were the underdog) and those who Cardiff stood a chance against (the rivals). There are usually better and worse times to face these rivals so the table below shows the form of the opposition coming into the match. The figure in brackets is the number of points won by the opposition in the preceding six games – why six games? Well, why not.

Ole Malky
Home Away Home Away
Rival Norwich 2-1 (5) Swansea 0-3 (4) West Brom 1-0 (5) Fulham 2-1 (4 from 5 games)
Villa 0-0 (7) Swansea 1-0 (8) Palace 0-2 (7)
West Ham 0-2 (2) Newcastle 1-2 (7) Villa 0-2 (8)
Southampton 0-3 (2) West Ham 0-2 (-)
Norwich 0-0 (6)
Stoke 0-0 (6)
Hull 1-1 (3 from 3 games)
Underdog Man Utd 0-2 (12) Man Utd 2-2 (13) Chelsea 1-4 (11)
Man City 2-4 (18) Man City 3-2 (3 from 1 game) Liverpool 1-3 (13)
Spurs 0-1 (9 from 4 games)
Everton 0-0 (2 from 2 games)
Arsenal 0-3 (13)

The three colours indicate the pairings that we’ll take a look at, trying to find two opponents with similar form, starting with…

West Brom and Norwich

Cardiff’s most recent two league victories of the season were against West Brom and Norwich at home, with both opponents coming into the game with five points from the previous eighteen. Cardiff’s lineups in both games are below.

Against West Brom (red), Mackay played one of his most attacking formations, the match being one of the few occasions under him where two strikers were used. Noone had his first start of the season and impressed in the early stages of the match, fading (understandably) later. Although the strikers had changed by the time Norwich (blue) came around, the lineup was quite similar. Medel played the same position, defending the back four on his own, Noone again played on the right with Mutch central and Whittingham frequently coming inside and leaving the left flank open.

game1

However, this lineup did not last long against Norwich. While Cardiff started brightly against West Brom, peppering their goal in the first half hour, it took only a few minutes for Norwich to take the lead. Solskjaer quickly realised his mistake and brought Zaha on for Whittingham, a rare tactical first half substitution. This gave Cardiff width and balance and also gave Norwich’s right back Russell Martin something to think about. His two heatmaps below show how he’d played most of the opening 35 minutes (top) in the Cardiff half but these opportunities disappeared from 35-70 minutes (bottom).

russellmartin

Cardiff scored the two goals that won the Norwich game in the space of one second half minute but they failed to kill the game off and Norwich fired in shots over the last half hour in a futile attempt to equalise. West Brom also did this to try and get an equaliser, Whittingham having scored a rare header to give Cardiff the lead, but not on the scale of the Norwich game. While WBA hit six attempts in the final 30 minutes, Norwich managed seventeen and could not believe that none of them went in.

As is often the case in single goal victories, there were moments in both games where the points could have been lost. Of these two matches, there is little doubt that win against Norwich was the more fortuitous. But Solskjaer’s willingness to fix something broken, even in the first half, was encouraging. Managers won’t always get things right to begin with and Solskjaer appears to be one of the few who don’t see an early switch as a mistake they are too proud to change.

Fulham and Swansea

Now – this match up is not going to be fair. Solskjaer has only taken Cardiff to the away ground of one of their bottom half rivals and it happened to be Cardiff’s worst performance of the season (at Swansea, of all places). Nonetheless, it has to be chosen. And of all the games to pair it with, it’s Cardiff’s only away win, at Fulham. Swansea came into the match with four points from their previous six games, the same number that Fulham had won (albeit from five matches as the season was young).

Solksjaer took a man out of midfield against one of the league’s most possession heavy sides, perhaps hoping that the Swansea (blue) midfield was depleted enough to take advantage. He was wrong and Swansea coasted to an embarrassingly easy three points. Cardiff used two strikers but could get neither into the match and the fullbacks, particularly Fabio, were caught out of position frequently.

At Fulham (red), Mackay played a conservative one man up front and yet struck 22 attempts on the Fulham goal (although accuracy was not impressive). The midfield, particularly Gunnarsson, did well to get forward, thanks to Medel putting in an excellent performance behind them. It should be noted that around half of Cardiff’s efforts came from set pieces, which is something that has dried up under Solskjaer.

gametwo

The big difference between the two games was the amount of ball Cardiff won in midfield. Whittingham was overrun in the centre against Swansea and Cardiff frequently went back to the goalkeeper. Against Fulham, eight Cardiff outfielders had more touches of the ball than Marshall; against Swansea, only Medel and Whittingham did. Swansea pressed Cardiff into turning backwards far more often than Fulham (no team can press from the front when the forwards are Bent and Berbatov) but when Cardiff needed options in attack, like Kim, Zaha and Bellamy should have been providing, there was nothing available.

Chelsea and Man Utd

For the final pairing of games, Cardiff travelled to play Chelsea (red) under Mackay and Man Utd (blue) under Solskjaer. At Stamford Bridge, Cardiff again played with one man up front and a defensive looking midfield containing Mutch playing what is his best role, as a midfielder attacking from deep. His running was rewarded in this game, as he gave Cardiff a surprising early lead by closing down a backpass to Cech. At Old Trafford, there was also an early goal but this was scored by van Persie. Cardiff then had little choice but to come forward, and they did this quite well, with Medel and Whittingham playing alongside each other in the centre, rather than Medel sitting back.

gamethree

Cardiff actually had more possession over the 90 minutes at Old Trafford, but Man Utd restricted them to staying in their own half – Medel took just 21% of his touches in the opposition half. While it might look good to win the possession battle in such a game, in reality this was a beleagured Man Utd team who were happy to let Cardiff have the ball in unthreatening positions and run out the clock (even from the 6th minute goal) to pick up their win. Cardiff managed just a single shot on target, and that was from outside the box.

Noone was Cardiff’s most dangerous player, only Young and debutant Mata had more touches in the opposition final third, but Cardiff’s front three were all too similar in style and small in stature. Cardiff put in 21 crosses, with only a third finding a man, and without Man Utd’s full backs needing to attack there was little opportunity for the wide men to cut inside and create something.

At Stamford Bridge, Cardiff’s game plan to keep Chelsea at bay took on renewed vigour with Mutch’s goal. They held out remarkably well and can only dream of what could have been had they gone in at half-time 1-0 up – instead, Eto’o sneakily, and in the view of many observers, wrongly, robbed Marshall of the ball to equalise. But whilst Chelsea had had plenty of the ball, they did not create many good chances. At least, not until the second half, when a combination of Cardiff’s tiredness, Medel’s substitution and Chelsea’s class resulted in the expected goals flying in. Even then, Cardiff still counterattacked well.

Conclusion

Football is a game of trying to score goals and stopping the other team from doing the same. Managers metaphorically live or die on how their team balances these priorities, and upon which they place more emphasis. If rumours are true, part of the reasoning behind Mackay’s departure was his preference for defending. Despite that, in all of these featured games, the Mackay team scored first while Solskjaer’s team has fallen behind first in every league match (except the 0-0 draw with Villa).

In these featured matchups, the difference between the two managers’ shot ratios (shots taken:shots allowed) is startling; Ole 27:61, Malky 46:41. This is very skewed thanks to the inclusion of Fulham/Swansea, but considering the season so far, it is clear that Cardiff are not better in attack under Solskjaer by the same proportion that they are weaker in defence. Despite this, both managers can thank one man for saving points in just about every match – David Marshall in goal. Without him, both approaches would have been doomed to failure. But Solskjaer comes in to the job with at least the chance to fulfil his remit to stay up with more attractive football.

Doing this with a squad bought to play defensively and a midfield who can counter attack but not hold possession in the opposition half is a task probably at the limit of his capability. Mackay, with a few seasons behind him at Cardiff, would have found it difficult enough to reshape a squad in January and Solskjaer had little chance. He has brought in players he knows from Norway and others with some calibre in England, Jones and Zaha, which is about all he could do on the budget.

But there is a genuine worry from his matches so far that the gap between Cardiff and their opponents looks wider under him than it did under Mackay. With matches running out to save their skin, Cardiff cannot allow this gap to widen.

Graphics provided by:
sharemytactics.com
squawka.com

The all-conquering Man City surprised nobody by beating Cardiff, although the match was a little closer than most had anticipated. Despite a spirited performance for 75 minutes, Cardiff dropped for the first time to the bottom of the division.

With Nasri injured, Silva and Navas started behind the usual Man City front two, with Silva roaming across the pitch and Navas targeting the right flank. Aguero wasn’t quite ready to start so Dzeko (again, very willing to drop back for the ball) and Negredo began up front. Kolarov played his usual attacking brand of full back play and Fernandinho dropped out for Javi Garcia to play as defensive midfielder, which gave Yaya Toure the opportunity to dominate the centre of the pitch.

Cardiff brought Gunnarsson and the fit again Mutch into midfield to try to counter Man City’s attacking threat, with McNaughton replacing John at left back, a position that harked back to his earliest days at the club. Odemwingie, a player who has not impressed much in the last month, also dropped out. The 4-1-4-1 shape was again similar to a Mackay team but with more desire to attack.

manccard

Man City took early control of the match, with only a desperate McNaughton tackle on Dzeko (and one not particularly close to the ball) preventing a goal in the opening minute. The threatened goal which brought up Man City’s century for the season eventually came with a mis-hit shot from Dzeko spinning over the line and setting off the referee’s goal detectors before McNaughton could clear. Although the game was only in the 13th minute, Man City were worthy of their lead, even if Cardiff could legitimately claim that the throw-in the move originated from was harshly awarded the wrong way and Silva controlled the ball on his upper arm.

Through balls
They continued to pen Cardiff into their own half whenever the Bluebirds were in possession and looked particularly dangerous when opening the defence up with angled runs and some clever through balls. The first half saw Man City attempt this a few times, two such occasions shown in the images below, one from the left flank and one from the right.

thruball1 thruball2

Without Cardiff’s wide players dropping back far enough and Man City’s fullbacks Kolarov and Zabaleta frequently attacking, the back four found themselves too spread out on the pitch to cope with the number of runners hitting the space between them. Kolarov, in particular, spend most the match in Cardiff’s half, as his heat map below shows. Over 70% of his touches came in the opposition half, more than Silva or Toure and even higher than Cardiff’s striker, Campbell.

kolheat

Noone’s attacking threat

Craig Noone, who has so far taken good advantage of his recent run of starts, was without doubt Cardiff’s best attacking threat. As noted in the preview, there was always the possibility that space left by Kolarov’s incessant attacks could let a pacey winger in, and Noone did well to take advantage. On one of Kolarov’s excursions up the field, leaving Dzeko behind him to cover, Cardiff won the ball and quickly countered. In the screenshot below, Kolarov’s position is indicated in yellow, and the gap that Gunnarsson and Noone exposed is clear. Demichelis, the centre back, raced over to cover and was taken out of the game by Gunnarsson’s neat inside pass to Noone. This left only Kompany with the decision of whether to close down Noone or cover the attacking runners in the box; after skipping round Kompany, Noone rolled the ball into the near post and Cardiff were level.

noone

However, a few minutes later, Noone, from a similar position high up on the right wing, should have played the ball off Kolarov to win a simple corner for Cardiff but instead lost it quite easily. One excellent through ball from Yaya Toure later saw the ball eventually find an unmarked Navas for a Man City lead they would not lose. But thanks to Noone, Man City could never fully believe the match was won until Yaya Toure overpowered Noone (this time turning up in central midfield) and burst up the pitch, pulling off a one two with Aguero before finishing. Noone vs Toure could never be a fair physical battle, and it would be wrong to blame Noone for his part in this goal. He is not on the pitch to win 50-50s with one of the most intimidating physical presences in the Premier League but to provide an attacking outlet to ease pressure on the defence. This, he did excellently.

Yaya Toure

Yaya Toure’s combination with Aguero, one assisting the other for the third and fourth goals, proved to be vital to secure the win, and the Ivorian’s powerful performance over the whole match was just as impressive. As befits his prolific season, he had just two penalty box touches but certainly made the most of them – both were shots and one was his goal. He combined very well with Silva and the pair found each other with passes more than any other combination of players. His pass map below, with a completion rate safely 90%+, shows how he dominated the centre of the pitch, whilst rarely dropping back or coming forward.

yayapass

Conclusion

Cardiff’s performance was encouraging but they need to play like this during February during key home matches against teams like Norwich and Aston Villa. Players like Noone must perform when the pressure is on and the opposition are happy to defend deep as well as when his opposing fullback allows acre of space. If he can continue his impressive recent consistent form then Cardiff may start scoring the goals that keep them up.

Graphics provided by
sharemytactics.com
squawka.com
fourfourtwo.com

Cardiff missed a chance to pick up a valuable three points against West Ham last week and their punishment could not be worse; Man City away is the most daunting fixture on the Premier League calendar. Only Sunderland and Stoke have stopped Man City scoring this season, and neither of those matches were at the Etihad, and with only Fulham having scored fewer goals than Cardiff this season anything other than a convincing home win seems fanciful. We’ll take a look at just how Pellegrini has turned a collection of world class footballers into such an intimidating force.

Man City are one of the few teams in the Premier League to play with two strikers, in a roughly 4-4-2 formation, where the wide players may be a creative number 10 (such as Silva or the injured Nasri), skilful winger (Navas) or a solid midfielder happy to come inside or track back (Milner). The two central midfielders, usually Yaya Toure and Fernandinho, tend to sit back and their incredible athleticism (Yaya in particular) allows them to burst forward rather than retaining possession in the opposition half, as you would see from Arsenal. They tend to sit in front of the back four and make themselves available for short passes should any of the attacking players need to turn back to realign their attack. With one or sometimes both staying back, this allows Man City’s fullbacks to attack, which they do with relish; Zabaleta and Kolarov top the defender assist table with five Premier League assists apiece. Despite some high profile mistakes by their defence this season, Joe Hart taking most of the headlines, Man City have still kept 8 clean sheets this season with no other club keeping more than 9. They lined up for their recent 2-0 win at Newcastle as below.

manc

Man City’s away form has been criticised as being a world away from their home form, but they have recently started to put this right and their determination to attack from the first whistle at St James’ Park is evident from full back Kolarov’s heat map in the opening 15 minutes (below). The Serb spent more time in the Newcastle half than in his own and it proved successful as he set up Dzeko’s opening goal in the 8th minute. After this hectic period, he could concentrate more on his defensive tasks, but he had already caused enough damage for Newcastle to fail to recover (although Man City did rely heavily on the referee cruelly disallowing a fantastic Tiote strike). As we will see later, the space behind Kolarov or Zabaleta may give Cardiff a chance to hit back.

kolarovheat

As mentioned, the job of Man City’s central midfielders is to allow the rest of the team to attack, and yet, in this season of the prolific deep lying midfielder, Yaya’s clever attacking runs have seen him reach an impressive goal tally of 10. His goal to shot ratio this season is an incredible 29% (in comparison to other high scoring midfielders, Ramsey (8 goals) is 20% and Hazard (9 goals) is 23%) while his 10 goals have come from just 14 shots on target (34 in total).

However, against Newcastle, he was a more lethargic character; perhaps because of his recent injury he didn’t cover anywhere near as much of the pitch as Fernandinho did, as the heat maps below show. He has had a week’s rest since that game but Pellegrini’s comments suggest that while he may be match fit, he is not at the level he was in December.

FernYayaheat

Irresistable attack

Should Man City win, as expected, they would sail through a century of goals this season. To score that many inevitably requires a range of attacking tactics, but a key one is the use of short crosses from the by-line into the path of a running forward; both of Dzeko’s midweek FA Cup goals against Blackburn came from low Navas crosses from the right while Aguero’s was made with a low cross from the left.

With two quickwitted strikers, Man City will always be threatening from crosses and this was illustrated well by their opening goal, below. The runs of the two strikers, Dzeko with the white arrow and goalscorer Negredo with the black arrow, start from behind the line of sight of the Blackburn defenders. Fernandinho’s cross from the right was a little to high for Dzeko but firmly met by Negredo.

Negredo1

The major selection story for Man City is whether Aguero, fit enough to come off the bench against Blackburn and score within a minute, will take the place of one of these strikers on Saturday. Only Man City could seriously consider dropping either Dzeko (five goals in three games) or Negredo (six goals in three games) to make way for an even better striker. While Man Utd would put Rooney or van Persie into action as soon as possible, Pellegrini can afford to be patient and not rush him. For this reason, it seems more likely that Aguero will have another second half cameo – not that this will necessarily reduce his chances of scoring immediately.

Stopping Man City

For most teams visiting the Etihad, leaving without having been on the end of a thrashing and conceding at least six goals, as Norwich, West Ham, Spurs and Arsenal have all done, is something of a success. Crystal Palace only lost 1-0 and they were able to do this due to Man City’s narrow formation. Fullbacks Boyata and Clichy failed to attack down their wings while Milner and Silva offered very little width further down the pitch. Should Zabaleta and Kolarov start as expected at fullback, Cardiff will need to deal with an onslaught that was spared Pulis’ Palace.

To create chances on the counter attack, Cardiff will target quick balls to the gaps left behind Man City’s advancing full backs. Liverpool did this with some success in their 2-1 defeat at the Etihad. Their attacking third pass map is shown below and it can be seen that they looked to the flanks in most of their attacks. T-C is an attacking full back and his overlaps with the right winger, be it Noone or Bellamy, would be crucial as part of Cardiff’s attack should they focus on the flanks, but he has been caught out advancing too far up the pitch in a few matches this season so his forward movement must be premeditated by the scoreline – at 2-0 down, Cardiff may as well attempt to pull one back, but with the memory of holding Arsenal to 0-0 up until the 88th minute still fairly fresh in their minds, it would be foolish for Cardiff’s full backs to attack with gusto while the game is goalless.

lpoolpasses

Navas is a old-style winger in so much as he is more predominantly right footed and prefers to get to the by-line than cut inside (as someone like Nasri would). This may actually be trickier for Cardiff’s left back, looking likely to be Declan John again with Andrew Taylor needing a few more weeks to recover, to deal with, as he could show a winger who tends to cut inside around the outside and hope he fails to find a team-mate with his cross. Showing Navas inside will only offer him a pass to another dangerous player. As such, Cardiff’s left sided centre back (Turner or Hudson) and Medel will need to be sure they are closing off passing options to numb the attack should Navas be forced inside. However, to cut off space behind, the back four will need to drop deep; to give any chance of hitting Man City on the break, as Cardiff were able to do in the 3-2 win earlier this season, Medel will have to return to the form he showed in that match rather than the displays seen more recently.

The Cardiff centreback pairing of Caulker and Turner are the division’s best so far in terms of successful aerial battles; no defender has won more balls in the air than Turner (81) with Caulker (74) not far behind. The aerial threat of Dzeko and Negredo may give Turner the edge in selection over Hudson. Cardiff should be well aware of the Man City strikers ability with their heads, as Negredo’s late consolation goal at the Cardiff City Stadium in August came with a well placed header.

Conclusion

This is the kind of game that is usually described as a stern test for a promoted side, but in reality it’s not even that. Cardiff have proved they can surprise the big teams (beating Man City, drawing with Man Utd, taking the lead at Stamford Bridge and holding Arsenal and Spurs until the death throes) but these matches were all played under Mackay, who had drilled Cardiff’s defence well.

It is still open to question whether Solskjaer can null opposition in the same way that Mackay could but failure to keep Man City out will give any answers to that. In truth, Cardiff will probably be pleased to leave without injury to either their players or their goal difference.

Graphics provided by
sharemytactics.com
squawka.com
fourfourtwo.com

The latest under fire manager, Sam Allardyce, earned a stay of execution with a 2-0 win at Cardiff, seeing the clubs change places in the league and Cardiff drop into the bottom three for the first time since the opening day (also a 2-0 defeat to West Ham). Ole Gunnar Solskjaer was making his management debut in the Premier League and his side put in a decent performance, only for the superior finishing of West Ham to steal the points.

Cardiff lined up in a 4-1-4-1, with Noone and Odemwingie the wide midfielders behind Campbell. Mark Hudson made his first Premier League appearance replacing Ben Turner and Declan John again played at left back. Theophile-Catherine returned after injury at right back, while Mutch was not fit and was replaced by Kim.

West Ham used a tight midfield three, with Downing and Jarvis encouraged to cut in from the wings and advance in front of the physical Carlton Cole as lone striker. Andy Carroll was available on the bench following a lengthy injury and Roger Johnson made a return to his old club after his January signing.

ccwhlineups

Cardiff dominated possession in the opening fifteen minutes but chances were rare for both teams, West Ham coming close with an overhit Downing cross beating everyone in the Cardiff area and hitting the post. Cardiff themselves hit the woodwork when a nice effort from Kim struck the underside of the bar and just bounced the wrong side of the line. These two chances could quite easily have gone in, but the game remained cagily goal-less for much of the first half that had been fairly even in chances.

The opening goal came for West Ham as half-time approached , with Carlton Cole bundling a cross into the net. When Taylor received the ball outside the area, Caulker moved towards him (indicated with the black arrow in the top screenshot) but failed to return back to his position in the back four quickly enough. Jarvis’ quick first time cross (bottom screenshot) went into an area that Caulker should have been positioned in to clear (white arrow). While Theophile-Catherine had gone to sleep briefly to allow Cole the space in front of him, the ball should have been cut out before then had Caulker not been drawn towards the ball when he had no need to.

Cole1

Cole2

Solskjaer’s style

Cardiff began to look more effective after the break – while the opening team selection was not a million miles away from one that Mackay may have picked, substitutions look to be an important part of Solskjaer’s management style. As a Man Utd player he was known as a super sub, and Alex Ferguson noted that he was so effective from the bench as he could see how the game was developing and where the holes in the defence were for him to exploit. In his first match managing Cardiff, the FA Cup win at Newcastle, the two late goals came from substitutes and Cardiff were to hope that he could do the same again. Bellamy came on for the, yet again, poor Odemwingie and played across the breadth of the pitch rather than staying on the right flank, as can be seen from the respective heat maps below.

bellamyodem

Bellamy’s movement allowed space for Kim to tend to drift towards the right flank vacated by Odemwingie, with Whittingham also able to get forward more often (although he saw less of the ball the further forward he went). Kim was Cardiff’s most involved player in the final third of the pitch, having more touches there and creating twice as many chances than any other player. Along with Bellamy, Kim looked most likely to be the source of an equaliser. As Cardiff pushed West Ham back, Noone was able to get forward more often, although this meant there was less space for him to exploit behind the deep-lying West Ham defence.

Other than their penalty claims for handball and holding at corners, the closest Cardiff came in the second half to scoring was a strong counterattack involving Kim finding Bellamy in space on the right and his cross being met by Campbell, only to be turned over the bar well by Adrian. What was most encouraging about this passage of play was that Whittingham and Noone had also got into the penalty area. The benefits of pace amongst the attack is clear and something that was sometimes shelved by Mackay in order to find more defensive stability. Time will tell if this is more successful in the long term, but it only can be if Cardiff take good chances like this one.

Further attacking changes

As Cardiff chased an equaliser, debutant Norwegian Eikrem came on for Medel and took up a more advanced position, before Cardiff became even more attacking following Tomkins’ deserved red card. Hudson left the pitch for Cornelius, as Cardiff moved into a 3-5-2 where two of the defenders were the still attacking full backs, T-C and John.

With the lead intact, West Ham were able to drop back and prevent Cardiff from space to create any excellent chances. Any that Cardiff did create were generally hit towards the goalkeeper who saved comfortably. With the fullbacks joining in with an almost all-out attack, it was with some inevitability that Cardiff would get caught out at the back, and they were in injury time when Carroll was released down the right flank (below). Caulker, as the sole defender, has no choice but to go towards him, leaving Noble (run indicated by white arrow) free to pick up Carroll’s pass and secure the win.

noble

Looking ahead

Cardiff’s next two matches are away to Man City and Man Utd. Despite having picked up four points from the two in the home encounters, Cardiff will view avoiding defeat in either match as a success. To do this, Cardiff will have to defend very well and the West Ham match possibly offered the only chance until February (in the league, at least) to see how Solskjaer will try to take a game to the opponent. Despite the result, he can be encouraged that Cardiff dominated possession and had plenty more shots. With a little more luck, whether keeping shots away from the goalkeeper or from decent penalty claims, the three points could have stayed in Cardiff. By the time of the next ‘winnable’ game (Norwich at home in February), Solskjaer may rely on success in the transfer or loan market to improve Cardiff’s shot conversion and start picking up points again.

Graphics provided by:
sharemytactics.com
squawka.com

Two brilliantly taken goals from Luis Suarez, and one cool assist, were enough to finish Cardiff off by half-time in Liverpool’s 3-1 win. The defeat was not unexpected for Cardiff and results elsewhere kept a cushion between them and the relegation zone. As Christmas is coming, Cardiffkickaball takes a brief look at the game.

Liverpool kept the same team and formation that had romped home against Spurs. Cardiff brought Gunnarson in to central midfield to give the midfield some more bite, Noone was given another start on the wing while Odemwingie, surprisingly, started up front.

lineups

Liverpool dominated the early possession, with the defensive trio of Skrtel, Sakho and Lucas seeing a lot of the ball, as they would throughout the match. Cardiff were able to hit Liverpool on the break, Noone coming close in the 15th minute, cutting inside from the right with a decent shot that was too close to Mignolet, but Liverpool were quite worthy of their opener from who else…Suarez.

Cardiff’s tactic of defending deep can be seen in the screenshot below; Henderson (white oval) is crossing to Suarez (black oval), with the direction of Suarez’s movement indicated by the arrow. The defence have been drawn towards the ball to block the cross and Suarez is foolishly allowed to move the other way. His finish is superb but far too much space is allowed around the penalty spot.

suarez1st

Liverpool continued to put pressure on Cardiff and in the final five minutes of the first half, two more goals were scored. Cardiff were caught after going forward for a set piece and Suarez and Sterling easily combined for the second goal, while the third was an exceptional piece of skill from the Uruguayan, curling the ball inside the far post from the edge of the area.

A more attacking Cardiff came out in the second half. The poor Odemwingie and at times overrun Medel were withdrawn for Kim and Campbell, which raised the prospect of Cardiff being hit repeatedly on the break with less cover in front of the defence. In fact, this gave Cardiff more control of the game. Mutch dropped back a little to allow Kim to play as attacking midfielder, while Johnson moved to Liverpool’s left back position. His attacking runs had pushed Noone back but with that threat removed, Noone was able to become more involved in the match.

Cardiff got their goal when a Whittingham free kick floated to the far post and was well headed back across goal by Mutch. After the goal, Cardiff began to threaten and after an hour, for the first time, possession was beginning to become even. In terms of goal attempts, this was Cardiff’s best spell of the match, with shots in the final half hour (and four in the opening hour). A second goal may have worried Liverpool but it was not to come.

Cardiff’s attacking outlook

Cardiff’s better performances of late have come with Noone rather than Cowie on the wing and the attacking outlook is something that appears to work. Had Cardiff gone for a win from the start of the game at Anfield, it’s unlikely they would have got it – extra space for Suarez would surely have allowed him to score while it is a lot easier to go for goals when you’re three nil down with nothing to lose. However, with two home games to come over Christmas, Cardiff will surely revert to the attacking formation seen against West Brom. Whether that includes the underperforming Odemwingie ahead of the underused Cornelius remains to be seen.

Graphics provided by
sharemytactics.com

Cardiff follow up the important win over WBA with a trip to second place Liverpool. Liverpool’s irresistible form has seen them win four of their last five matches and they have the league’s top marksman up front, Luis Suarez.

Brendan Rodgers has been one of the more creative managers this season, alternating between a back three and four at times and sometimes using a strike partnership or lone striker. Against Spurs, and without Gerrard and Sturridge, Liverpool played a 4-3-3, with Coutinho supporting on one side and Sterling staying in an attacking position on the right flank. Henderson has also played on the right flank, but he was central this time, alongside Allen and in front of the defensive Lucas. Youngster Flanagan made another appearance at full back, with the overlapping Johnson on the right.

Liverpool

Luis Suarez

Suarez’s performances this season have been nothing short of exceptional and there have been very few top division players in recent years with a run of form quite like this, particularly one lasting a couple of months. He is averaging around a goal and a half per match and even that is not the full story. Not only has he outscored every other player this season (having missed the first five league matches) but he has also set up more goals than anyone else. Calling Liverpool a one man team is unfair but you have to look to Cristiano Ronaldo or Diego Costa to find another player currently in such dominant goal-a-game form in a major league (and Suarez’s 16 goals in 11 games beats Ronaldo’s 17 in 15 or Costa’s 17 in 16 comfortably).

Against Spurs, Suarez either scored or assisted all five goals and only Arsenal and Hull have managed to keep him from doing either in a match this season. In contrast to those efforts, Spurs did their best to help him. Spurs and Villas-Boas were widely criticised after the game for playing a high line against Liverpool, which is certainly true, but it has to be noted that Capoue (filling in as a makeshift centre back) did not adjust well enough to playing at centre back and consistently played far higher up the pitch than Dawson. Their complete lack of awareness of each other showed as Capoue regularly drifted forward into his regular position as defensive midfielder, leaving Dawson stranded behind him and a large expanse of grass for Suarez, Coutinho and Henderson to race into, safely onside. Liverpool’s opening goal is shown in the screenshots below, with the gap between Capoue and Dawson indicated by the black line.

In the first screenshot, Capoue has raced out to close down Suarez, who plays a decent, but not too dangerous, through ball to Henderson. Dawson cuts the ball out with a slide tackle (second screenshot) and there is a shield of four Spurs players between Dawson and Suarez; however, none make as much effort in tracking back as Suarez does in racing forward. Henderson recovers the ball (third screenshot) and plays it into Suarez, whose run is indicated with a white arrow and he finishes expertly.

opener1

opener2

opener3

Gaps behind the defence

The respective heat maps of the Tottenham centre back ‘pairing’, if they can be called that, are shown below, with Dawson above and Capoue below. The left image shows their positions over the whole 90 minutes and it can clearly be seen that Capoue is frequently far in advance of his partner. Most of his excursions into the opposition half occurred between 75 and 90 minutes (right image) as Spurs chased a point at 2-0 down and it is no coincidence that Liverpool scored a further three in this period, having a dominant 70% possession over the final 10 minutes.

spurscb  spurscb2

In comparison, the heat maps of Cardiff’s centre back pairing (Turner top and Caulker bottom) from the West Brom clean sheet are shown below. This is more typical of what you would expect to see, with both centre backs taking up a position between the penalty box and halfway line.

cardcb

In front of the Cardiff back four, as always, will be Medel but the positions of the other midfielders is less certain. Whittingham could well be on the left flank again to give defensive assistance to Taylor, in order to reduce the threat from Liverpool’s right wing. Liverpool’s formation against Spurs listed to the right, with Coutinho frequently cutting inside from the left and Sterling pushing forward with Johnson overlapping him from full back. On the left, the relatively inexperienced Flanagan was unprotected (although he did make some visits to the opposition penalty box, including his goal) which might give an opportunity for one of Cardiff’s pacey boyhood Liverpool fan right wingers, Noone or Bellamy, to attack him. If one was selected, Cowie may be given a central defensive midfield start to move over and provide some cover when necessary, with Mutch playing as the box-to-box midfielder and also pressing high (as he did successfully to score at Stamford Bridge).

Liverpool passing

Liverpool tend to try and build from the back, so pressure on the centrebacks and Lucas to prevent Mignolet passing them the ball is vital. Against Spurs, Lucas was Liverpool’s second top passer and received 92% of his passes in his own half (his position when receiving passes is shown below) and his discipline to stick to his role is admirable. By comparison, Capoue (an extreme example, perhaps) received 28% of his passes in the opposition half, despite supposedly playing at centre back. Campbell and Bellamy, if playing, are both used to chasing down defenders and they will be required to force Mignolet to play long balls, which should give Caulker and Turner, both excellent in aerial duels, an advantage in winning the ball back.

lucas

The Cardiff defensive line will not be as high up the pitch as Spurs was, which will make through balls a lot more difficult; however, it will also increase the playing area available for Liverpool to use. Cardiff’s hope will be to limit space by crowding their own half and that can only be done with bodies. Expect to see Mackay revert to the tactic of the wide players dropping back to the back four line, forcing the full backs closer to the centre backs and there is every chance that another defensive minded midfielder will play alongside Medel.

Liverpool dominated the ball against Spurs, a passing team themselves, completing 411 passes to Spurs’ 272, and Liverpool winning the possession battle in this game is inevitable. It might be a long afternoon but Cardiff’s chances of returning with a point, or even returning with a respectable defeat, depend on how rarely the passes find Suarez.

Graphics provided by:
sharemytactics.com
squawka.com
fourfourtwo.com/statszone

Steve Clarke could probably never have imagined how bad his trip to Cardiff would be. Although his team only went down 1-0, he was surprisingly sacked not long after the final whistle. The win for Cardiff takes them closer, in points, to the top half of the table than the relegation zone – for now, at least.

Lineups

Cardiff played one of their season’s most attacking formations,4-1-3-2, as Mackay recognised the need to go for the win. Taylor returned at left back while Noone, on the right wing, was given his first Premier League start. Campbell and Odemwingie played as a front two, with Campbell frequently dropping deep.

West Brom recalled Olsson to the back four and used Yacob and Mulumbu to give some cover in front of the back four, with Mulumbu being allowed to push forward more than usual. Sessegnon, who did not wear his shooting boots, supported Long, who spent much of the match walking slowly back from an offside position.

cardwba

Cardiff started the game well, showing intent to attack from the first whistle. They dominated the first 30 mins, completing around double the number of passes as WBA, but were restricted to shooting from range. Once the storm was weathered, WBA were able to get Mulumbu, their most potent force for transitioning the ball from defence to attack, involved more often but they still struggled to get into dangerous positions.

The table below shows the number of shots made by each side with the game broken up into three equal periods. Cardiff’s goal came at the start of the final third of the match – after this, West Brom had their most successful period of creating shots, but only Long’s header, wonderfully saved by Marshall, was on target.

0- 30 mins 30-60 mins 60-90 mins
Cardiff 6 2 3
West Brom 1 5 6

Craig Noone

The impact of Craig Noone on Cardiff’s attacking play was something fans and management will have looked at closely to see if he could provide something of a solution to the recent impotence. He started the game brightly but faded considerably as the game went on. The two heat maps below show the first 30 minutes of the game (top) when he attempted seven passes and three crosses and the final 60 minutes of the game (bottom) with just two passes and five crosses attempted. One of these latter crosses led, of course, to Whittingham’s headed goal but, overall, the 90 minute performance did not do a great deal to dispel the theory that Noone is better as an impact player. The bottom heat map shows how he increasingly had to roam over the pitch in an effort to find the ball.

Noone

While he attempted to beat his man more times (six) than any other player, Noone was successful just twice. Compare that to Mutch’s four out of four and Odemwingie’s three out of four, and also consider that both players (and Whittingham) saw more of the ball in the attacking third than Noone, and his attacking qualities seem a little less reliable – although it certainly needs to be stressed that this was Noone’s first ever Premier League start and expectations should not be too high. The presence of an attack minded wide player is without doubt positive for Cardiff and it will be up to Noone over the rest of December, now that he has earned the chance of another start (perhaps not at Anfield), to prove that Cardiff should look to him and not elsewhere in the transfer window to provide this.

The front two

For the first time this season, Cardiff played with two strikers centrally, with Odemwingie as the more advanced and Campbell dropping back to find the ball. In general, Odemwingie was quite wasteful, perhaps showing too much desire to prove West Brom wrong for letting him go, and Campbell really struggled to get involved. The West Brom cover in front of the defence was fairly effective at minimising the contribution of Cardiff’s strikers, with Mulumbu (15) and Yacub (8) making more loose ball recoveries than anyone else. This shielded the defence and Cardiff were forced to make the majority of their shots (nearly two thirds) from outside the penalty area with none at all coming from within the six yard box. While Odemwingie saw far more of the ball than Campbell, he was frequently forced to send the ball to the wings rather than attack the defence head on. Campbell has the pace to attempt this and, with West Brom’s centre back pairing being a little slow, he should probably have been used as the spearhead of the attack. Odemwingie may be concerned that he did not really do enough to justify a start in the next game.

One striker vs two

While two strikers sounds, on paper, like an attacking formation, in reality Cardiff may have been better off by using an attacking midfielder like Kim or Mutch in Campbell’s position and playing Campbell as the advanced striker. Campbell’s instincts are to evade the defence rather than play through it and without space in front of him he found it hard to, firstly, receive the ball, and then use it effectively. Campbell and Odemwingie both have a game that is a little too similar to work in this system, and as Mackay appears to still be reluctant to start with Cornelius, who should complement either, Cardiff would probably do better to use a more creative (Kim) or driving (Mutch) player behind the striker, as long as attack minded players (like Noone or Bellamy) are also used on the flanks.

Next up for Cardiff is a trip to Anfield to play the other team who were the final straw for a club board’s patience with their manager this weekend, as Villas-Boas left Spurs following their 5-0 home defeat to Liverpool. No doubt Cardiff’s formation will revert to the more defensive lineup seen for most of the season in an attempt to contain the country’s most in form player (possibly in Europe), Suarez. Cardiffkickaball’s preview to the game later this week will take a look at how Liverpool have hit great heights lately.


Graphics provided by:
sharemytactics.com
squawka.com

Cardiff followed up the disappointing performance at Stoke with an even worse one at Palace, going down 2-0 to their relegation rivals. In spite of Mackay’s post-match comments, Cardiff didn’t create chances and rarely threatened once Palace had taken an early lead. Having not scored in three matches, Cardiff face West Brom at the weekend, another team on a downward spiral, and really do need a win to give their form a kickstart.

Both of Palace’s wide players, Puncheon and Bannan (especially) tended to drift inside and Chamakh putting in a good performance supporting Jerome.

palacelineup

Cardiff started with Kim on the left flank in a failed attempt to give some attacking threat. Mutch and Whittingham returned as the midfield partnership ahead of the holding Medel. With Taylor still injured, Declan John was again given a start at left back.

cardifflineup

The outcome of the game was determined after just 5 minutes. Whittingham fashioned an opening in the first minute and poked the ball wide to Cowie, whose cross from the right flank found Campbell between the centre back and right back. He headed down into the ground with a lot of the goal to aim at but Speroni pulled off a decent save. Shortly after the corner was cleared, Palace sustained some pressure in the Cardiff box and Puncheon found Jerome in the middle. He also headed into the ground and close to the keeper, but Marshall could not replicate Speroni’s save. Palace had an early lead that they would not lose.

The goal could have been stopped a number of times before it finally went in. Although Turner did well to recover from being the wrong side of Jerome when he was initially released, the Palace striker was quickly crowded out and Cardiff failed to clear far enough. Young left back Declan John was easily turned by Puncheon and at the moment of the turn, Turner has his eyes only on Jerome (indicated in the screen shot below with the black line). By the time Turner realises the ball is coming in and Jerome is on the move, he has lost his man. Jerome’s header was not particularly firm and bounced up close to Marshall – with the season he has had so far, he should have done better.

turner

What is even more galling for the defence is that Jerome and Chamakh, as highlighted in the preview, are poor in the air. Over the course of the game, they won just six out of 25 aerial duels and Jerome won only two headers all day; stats that he can take with a wry smile when one of them is a goal.

With the pivotal moment coming so early, it’s hard to see what Palace changed to keep Cardiff out. But the early goal played into Pulis’ hands as the first thing he has done with Palace is instil a tight defence. Cardiff managed just two more shots from range in the first half as they either played balls to the flanks without managing to get crosses in or tried hopeful long passes through the middle that rarely paid off and were easily won by Gabbidon in the air. The graphic below shows their first half passes into the attacking third. Barely more than half (dark blue) are successful.

attackinthird

In the second half, Cardiff brought on Noone for Cowie in the hope of targeting Palace’s out of position left back, Ward, who had started on the right but moved over due to Moxey’s injury. Cardiff did have more possession in attacking areas in the second half and with a good enough player at number 10 might have been able to create more. Jedinak was not giving much protection in front of the back four, but Gabbidon and Delaney were comfortably clearing Cardiff’s central attacks. Cardiff’s wingplay, even against an unsettled full back, was mainly unsuccessful with just two of 14 second half crosses (most from Noone’s wing) finding a man in the middle. When they needed the ball in the middle, they could not make it stick.

With Cardiff unable to hold on to possession, Palace repeatedly hit back on the break. Medel advanced up the pitch as Cardiff chased the game and, unusually, made more attacking third passes than any other Cardiff player over the course of the game, which allowed space in front of Cardiff’s back four for Chamakh to hold up the ball. The win was eventually sealed with unmarked Chamakh’s strike from the edge of the area, having loitered in the zone between Cardiff’s defence and midfield without being picked up. Cardiff had allowed Palace space repeatedly and the home side may have been surprised at how easily they won the points.

West Brom

As Cardiff lost 2-0 to a rival at the bottom end of the table, so did West Brom, going down 2-0 at home to Norwich. West Brom’s form is also dipping although they fell to a smash and grab raid from Norwich on this occasion. The Baggies were dominant with 26 shots in total as they chased an equaliser following an early goal (nearly half of their shots were on target), while Norwich managed just three on target. These were enough, however, to seal the win.

With Jonas Olsson suspended, Lugano had his first league start at centre back against Norwich. Olsson is likely to reclaim his place at the weekend. Yacob and Mulumbu as the two holding midfielders have given good cover in front of the West Brom defence and both tend to stay central so Cardiff may be encouraged to use two attack minded wide players to create chances (something Mackay has been loathe to do this season).

wbalineup

West Brom’s form does not necessarily match their performances, with just one win in the last nine games (the previous being the notable win at Old Trafford). Not only did they dominate this match in terms of chances, they were also close to ending Mourinho’s unbeaten home league run at Chelsea until a highly dubious last minute penalty awarded against them.

The difference between the West Brom of this season and last is stark – Romelu Lukaku. On loan last season, the Chelsea striker scored 17 league goals and finished as their top goalscorer, with more than double the number scored by Long (who played in more matches). While Clarke tried to replace Lukaku with a few different players, the problem is continuing – this season, only six goals have come from their strikers, all three of top-scoring Long’s coming in a 41 minute spell against Chelsea and Villa. Long was dropped for Victor Anichebe against Norwich (Anichebe having scored the late goal in the previous 2-3 defeat to Man City), with Anichebe then guilty for the most misses during the match, missing all six shots from inside the area and he certainly should have finished at least one of them. Indeed, West Brom’s shooting accuracy ratio of 16% over the season is the worst of all teams except Hull.

While Lukaku was finishing his chances, he was also having more. Last season, Lukaku averaged a touch every 2 minutes (similar to Anichebe this season) and had a chance every 26 minutes unlike Anichebe at every 37 minutes, the equivalent of one chance fewer per game. With fewer chances coming around and more of them being missed, it’s little wonder West Brom are, like Cardiff, struggling for goals.

sesspasses

Supporting the striker, Sessegnon was lively against Norwich but has also had a fairly unproductive season. His pass map is shown above and it can be seen that while he did not give the ball away often, he would usually choose to go sideways or backwards. Medel will likely be the player sticking close to Sessegnon and he will hope to consistently force Sessegnon away from danger.

Against Norwich, West Brom did the majority of their attacking on the right flank, with Billy Jones at right back receiving the ball more often than any other player but his crossing was poor, finding his man just once from eight attempts. Alongside Jones in the defence, West Brom field two older centre backs, Olsson and Macauley, who may find the pace of Campbell a handful. Norwich’s opening goal by Hooper came as he outpaced the pair from a simple through ball between them (and Hooper is by no means a quick player). However, they are as strong in the air as Cardiff’s pair – West Brom have allowed fewer headed attempts on goal than any other club this season.

In the two previous games against relegation rivals, Cardiff were guilty of hoping to keep the opposition out instead of going for the win. Those were away games where a point was a good result, but it is concerning that the attitude did not change against Palace, despite being behind for 85 minutes. Fans who would like to see Cardiff attack may be encouraged by Norwich’s win, where they played with two strikers (Elmander and Hooper) and a very attacking right winger in Redmond.

Whether Mackay does take the game to West Brom this weekend remains to be seen; if not, then Cardiff run the danger of seeing West Brom’s recent bad luck running out.

Graphics provided by:
sharemytactics.com
fourfourtwo.com/statszone

On an exciting evening of Premier League football, Stoke and Cardiff bucked the trend by playing out one of the season’s most tepid 0-0 draws to date. If we didn’t learn whether Messi could perform on a cold winter’s night in Stoke, we discovered the names of a good number of players who certainly can’t. The point did allow both teams to rise up the table, but while it was an acceptable point for each, neither can be delighted with the performance.

Stoke lined up in a 4-2-3-1, with Wilson coming in at centreback, Arnautovic starting on the right and Adam pushing forward to provide balls for Crouch.

stklineup

Cardiff went to a more defensive side than had been seen against Arsenal, with Whittingham moving to the left flank to replace Kim. Declan John came in for Taylor at left back and Gunnarson sat in front of the back four with Medel.

cardifflineup

Stoke had the better of the early possession, particularly on the left flank, but they could not create good openings and were restricted to speculative efforts from range, which Cardiff could block at the source. Gunnarsson moved into the middle to stop Adam’s playmaking abilities and Cardiff were then able to get Mutch on to the ball more often. With Campbell coming so deep that he could not receive the ball inside the area, it was down to Mutch to be Cardiff’s attacking threat, as little of it as there was. Mutch had more goal attempts over the match than any other player and was responsible for the best chance of the first half, when he was first to the near post to firmly head a Whittingham corner goalwards, only for Begovic to save.

The heat maps below show the positions of Campbell (top) and Mutch (bottom) in the first half and how often Mutch pushed ahead.

campbmutchheat

Both teams found themselves battling on the same flank, with Stoke’s left sided Assaidi and the combination of Theophile-Catherine and Mutch, in the second half particularly, on Cardiff’s right seeing a lot of the ball, with Cowie happy to drop back and allow T-C to come forward. Stoke leftback Pieters was substituted at half-time for Muniesa, a player more suited to centre back, which was a major factor in Mutch spending more time on the right flank as the game progressed. Mutch’s second half heat map, to be compared with the first half above, can be seen below.

mutch2ndheat

The youngster Declan John made a rare appearance at left back so Cardiff spared him too much ball. John’s start may have been a factor in Mackay’s decision to move Whittingham back to the left flank, where he had put in fairly unconvincing performances earlier in the season, in the hope that he could provide better defensive cover for him than a player like Odemwingie might. With Cowie and Whittingham playing wide, Cardiff had only T-C able to give attacking presence on the flanks (the right-back having twice as many touches in the opposition half as John).

Just as T-C and Mutch combined, Adam and Assaidi rained in crosses from Stoke’s left but Turner and Caulker dealt with them well, Crouch having a single header on goal. Despite their previous reputation, Stoke have failed to score with a header all season which underlines the change in approach that Hughes has tried to bring to them. But with so many members of the squad very much in the Pulis mould, Stoke face a tough season of transition. As yet, Hughes has not brought the best out of smaller players like Ireland, although he had the opportunity to win the match late on, only to fire a wild shot when unmarked in the area.

The match was doomed to remain scoreless (though Stoke had a goal narrowly ruled out for offside) despite Adam’s attempts to create a talking point with a couple of incidents he may well have received a second yellow card for.

Crystal Palace

While Pulis might claim that Stoke were never a long ball team, he would probably find many disagreeing. But since replacing Ian Holloway at Crystal Palace, he has brought defensive stability where there had previously been none and a chance of staying up (to be fair, the turnaround had begun under the temporary care of Keith Millen).

Palace are on an enviable run of form, seeing them win two of the last four matches and conceding just one goal. 1-0 wins over rivals Hull and West Ham (with a defeat to Norwich) have given them hope. They lined up against West Ham in a 4-2-3-1:

palacelineup

West Ham dominated the ball in the match, completing 349 passes to Palace’s 166, and yet Palace managed five shots on target to West Ham’s two. Although Pulis may claim otherwise, Palace certainly did look to find Jerome with long passes – 20% of their passes in the match were deemed as long (compared to 15% of Cardiff’s and 16.6% of West Ham’s, two teams which are known for being quite direct too). But when a team has as little of the ball as Palace did against West Ham, playing a direct route must be deemed sensible. The image below shows the length of passes received in Palace’s attacking third of the pitch and how they lost possession from these passes (red is unsuccessful) just under half of the time.

palacepasses

As with any system, the players have to be suited to the direct approach for it to pay off best. Jerome and Chamakh may have been the targets of higher balls, but they won just seven out of their 26 aerial duels against West Ham. Turner and Caulker’s aerial success rate in the Stoke match (12 out of 23) looks far better and was achieved against the lanky Crouch. With 56 balls won, Turner has the second best aerial stats for a defender in the Premier League this season and if he can keep this up, Palace will find it hard to get themselves into dangerous positions.

Defensively, Palace allowed West Ham to come into their half before attempting tackles (seen in the image below), although they were quite effective at also keeping the Hammers away from the danger zone. West Ham managed only one unblocked shot on target from inside the area, which was saved by Speroni.

palacetackles

This may well be another cagey encounter, particularly if Mackay elects to play for a 0-0 draw away to a rival, as happened at Stoke and Norwich. With Palace’s recent low scoring matches, there’s little reason to think this game will be pan out any differently. While there may be goals in this game, don’t expect either manager to go looking for them.


Graphics provided by:
sharemytactics.com
squawka.com